![709081_APP-Logo White_042920-2.png]](https://knowledge.agencyperformancepartners.com/hs-fs/hubfs/709081_APP-Logo%20White_042920-2.png?width=50&height=50&name=709081_APP-Logo%20White_042920-2.png)
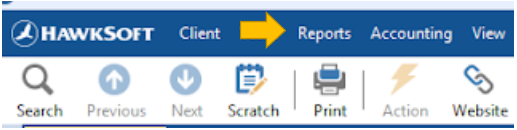
Select “Reports” then “Advanced Reports”
“Report Generator” will open in a new window
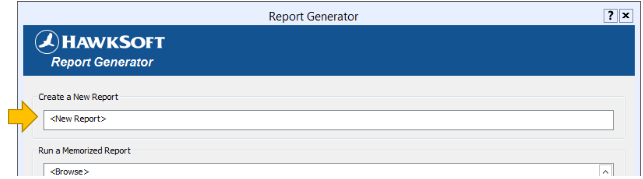
Click “<New Report>” under “Create a New Report”
The “Policy Type Filter” window will open
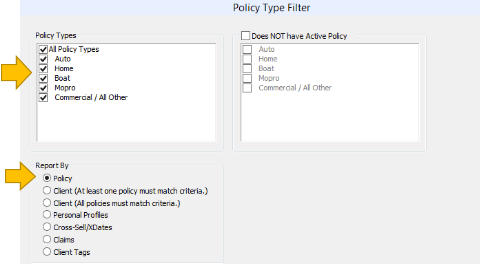
Select “All Policy Types” under “Policy Types”
Select “Policy” under “Report By”
Click “Next”
The “Report Generator Filters” window will open
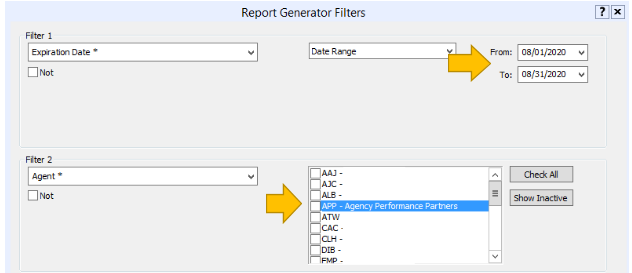
Select “Expiration Date” under “Filter 1” then “Date Range” then enter date range
Select “Agent* or “Agent 2” or “Agent 3” under Filter 2 and select your initials
“Filter 3” is left blank
Click “Next”
“Filter 4”, “Filter 5” and “Filter 6” are left blank
Click “Next”
The “Report Layout” window will open

Click “Add/Edit”
The “Add Report Filters” window will open
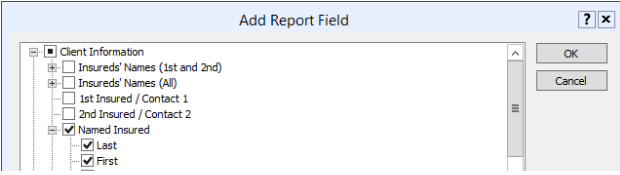
Under “Client Information” select the following fields:
Named Insured-Last
Named Insured-First
Business Name
Business DBA Name
Under “General Policy Information” select the following fields:
Agent or Agent2 or Agent3
Company
Line of Business
Policy Title
Click “OK” then “Finish”
The report will open once completed.
*Under “General Policy Information” you will need to select “Agent*” “Agent 2” or “Agent 3” based on how your agency has assigned the account review calls. These instructions are for a basic Producer or CSR Renewal Review Report. We recommend that you tailor the Filters and Fields to your agency’s report needs.