![709081_APP-Logo White_042920-2.png]](https://knowledge.agencyperformancepartners.com/hs-fs/hubfs/709081_APP-Logo%20White_042920-2.png?width=50&height=50&name=709081_APP-Logo%20White_042920-2.png)
To access Smartflows click on the “AI” option located on the Global Navigation toolbar.

Select “Create Smartflow” to begin creating the Smartflow.

Select “Expiring Policy” from the drop-down menu.
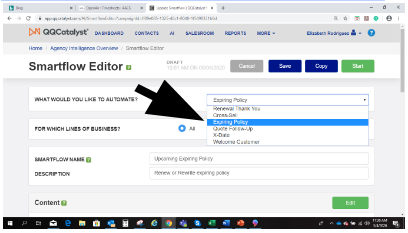
Add a name and a description to your Smartflow.

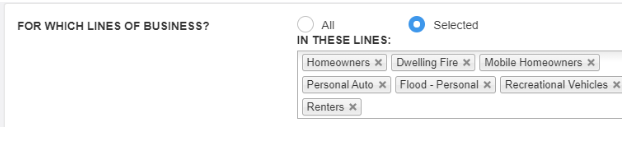
Select the lines of business you would like to target for Personal Lines customers.
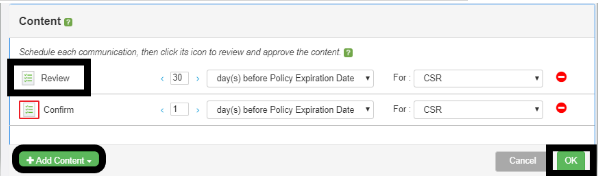
The automated Tasks are setup in the Content section. The icons within the Content section are called “Events”. Click “Edit” to begin the setup.
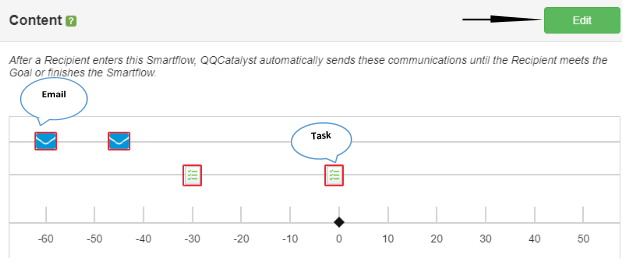
Use the delete option to remove the Emails Events from the Smartflow.
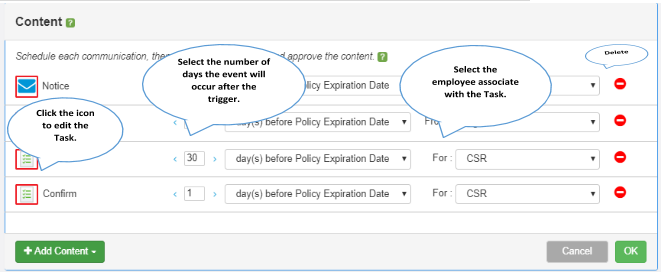
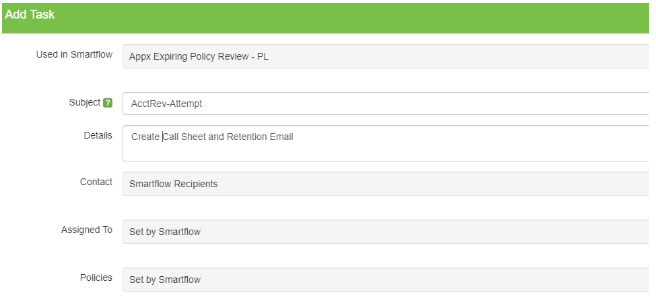
To customize the Task, click on the Task icon. Add the:
Subject: Account Review
Details: Create Call Sheet and Retention Email
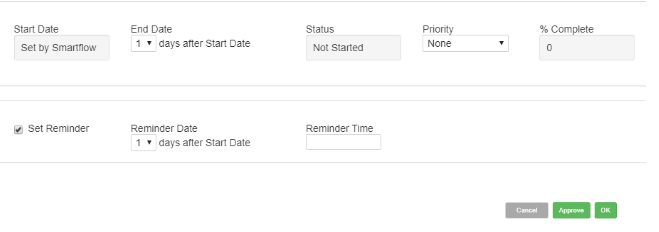
Setup the Start Date and Reminder Date. Select “Approve” to approve the Event. You cannot start the Smartflow until you approve each Task.
Once you have “Approved” the Task, the red outline around the icon will disappear. Unapproved Tasks will have a red outline. To add additional Tasks, click the “Add Content” option. When all Tasks have been setup and approved click “OK” to close window.
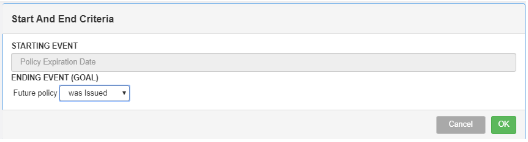
You can edit the “ENDING EVENT(GOAL)” option.
After you have approved each event, click Start that is located on the toolbar to start the Smartflow.

The AI Overview Dashboard will help you keep track of the Tasks that have been created and that have been completed.
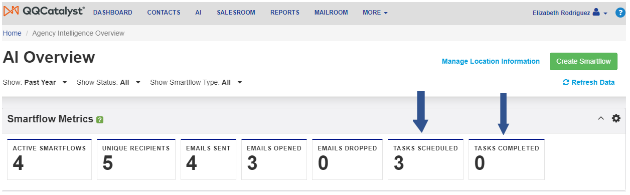
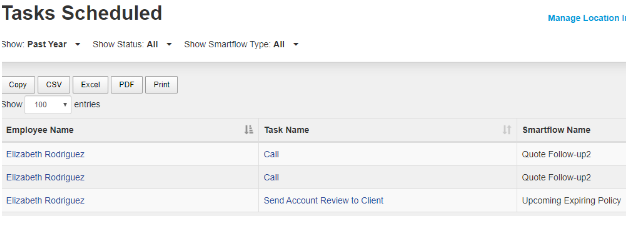
To view specific information regarding the Task, click in the Tasks Scheduled or Tasks Completed.
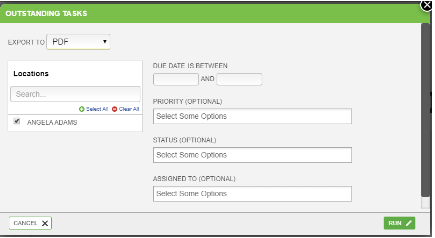
To keep track of Task Status, you can also run an “Outstanding Task” report that is located in the Standard Library. This report can be run by Task Due date, Priority, Status and Assigned Agent/CSR.