![709081_APP-Logo White_042920-2.png]](https://knowledge.agencyperformancepartners.com/hs-fs/hubfs/709081_APP-Logo%20White_042920-2.png?width=50&height=50&name=709081_APP-Logo%20White_042920-2.png)
Desired Outcome
- Seamless Weekly Execution: Turn blog posts into polished email campaigns quickly using established templates and AI tools.
- Flawless Tracking & Formatting: Ensure every image, button, and text link routes to the correct Bitly URL and monthly campaign container.
- Brand & Schedule Consistency: Deliver emails reliably on schedule (every first week at 10:30 AM EST) with fully updated monthly CTAs.
Unacceptable Actions
- DO NOT launch an email with broken or generic placeholder links—always swap in the specific Bitly URL for the blog and CTAs.
- DO NOT leave outdated graphics or CTAs from previous months in a cloned template.
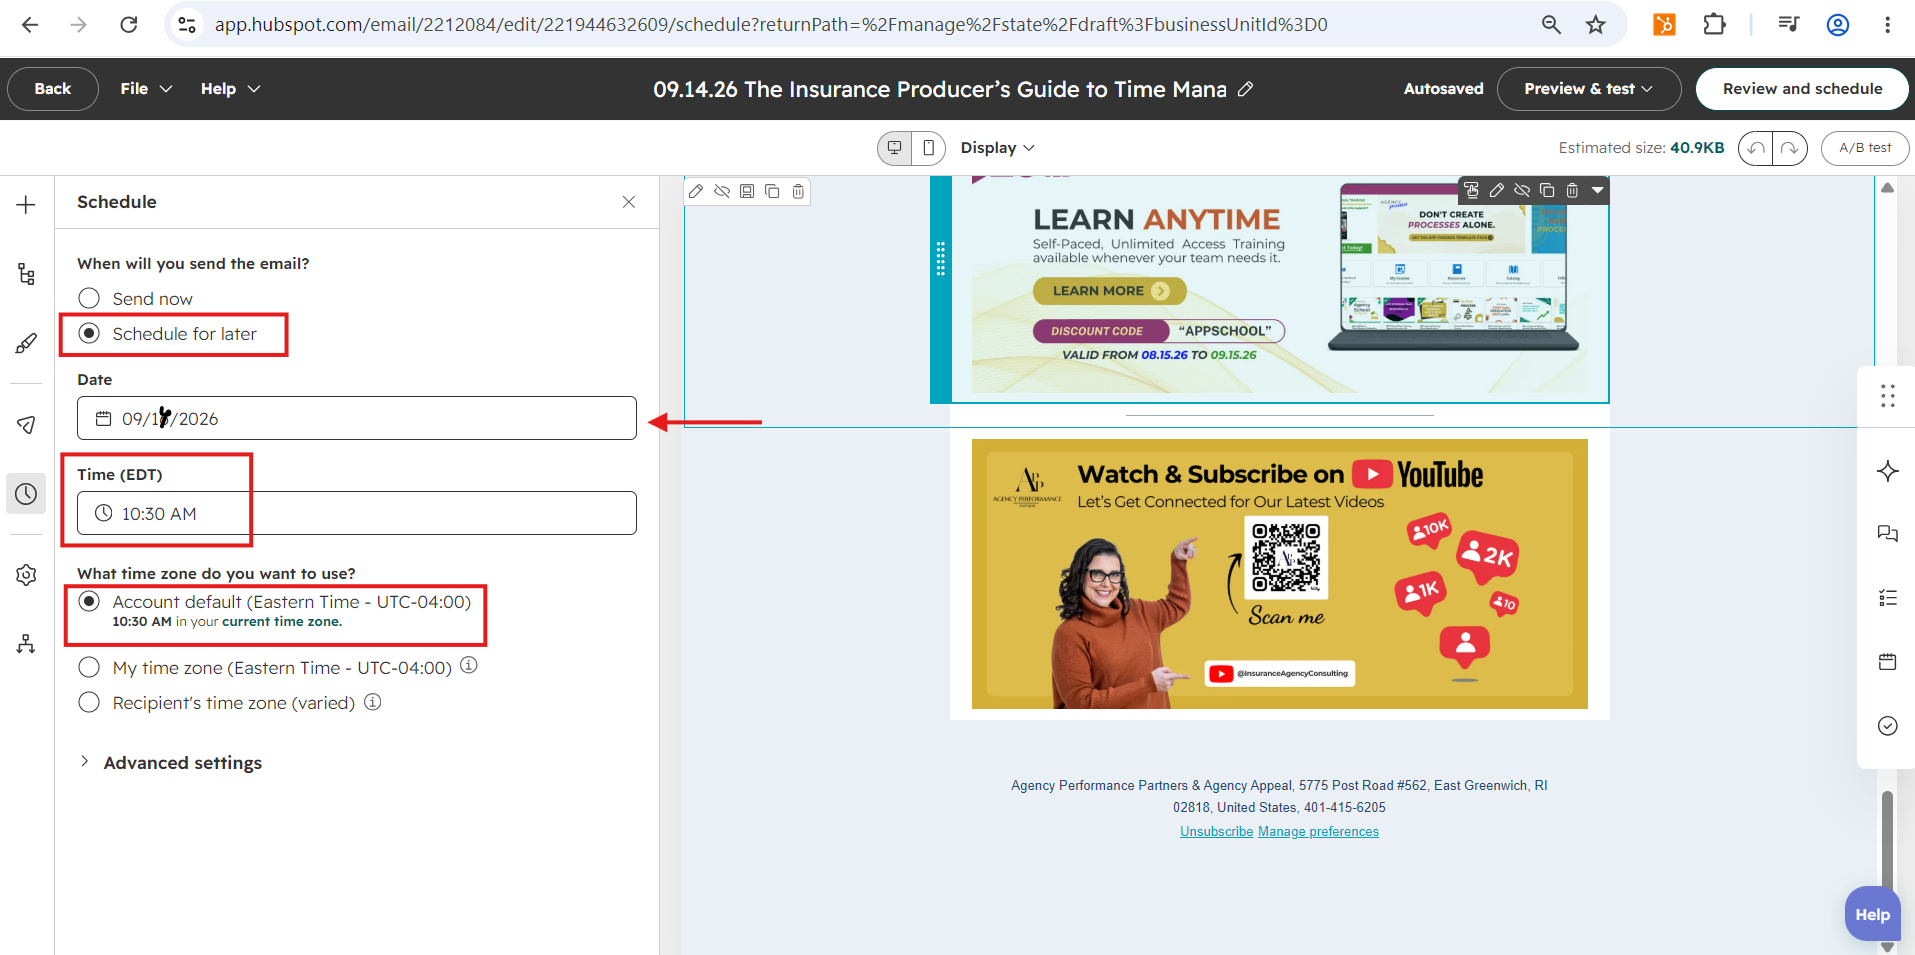
- DO NOT forget to set the email send time precisely to 10:30 AM EST.
- DO NOT publish without associating the email to the correct monthly Marketing Campaign in HubSpot Settings.
Step-by-Step Operating Process
Follow these steps in order to clone, update, and schedule your weekly blog email:
Step 1: Clone the Email Template
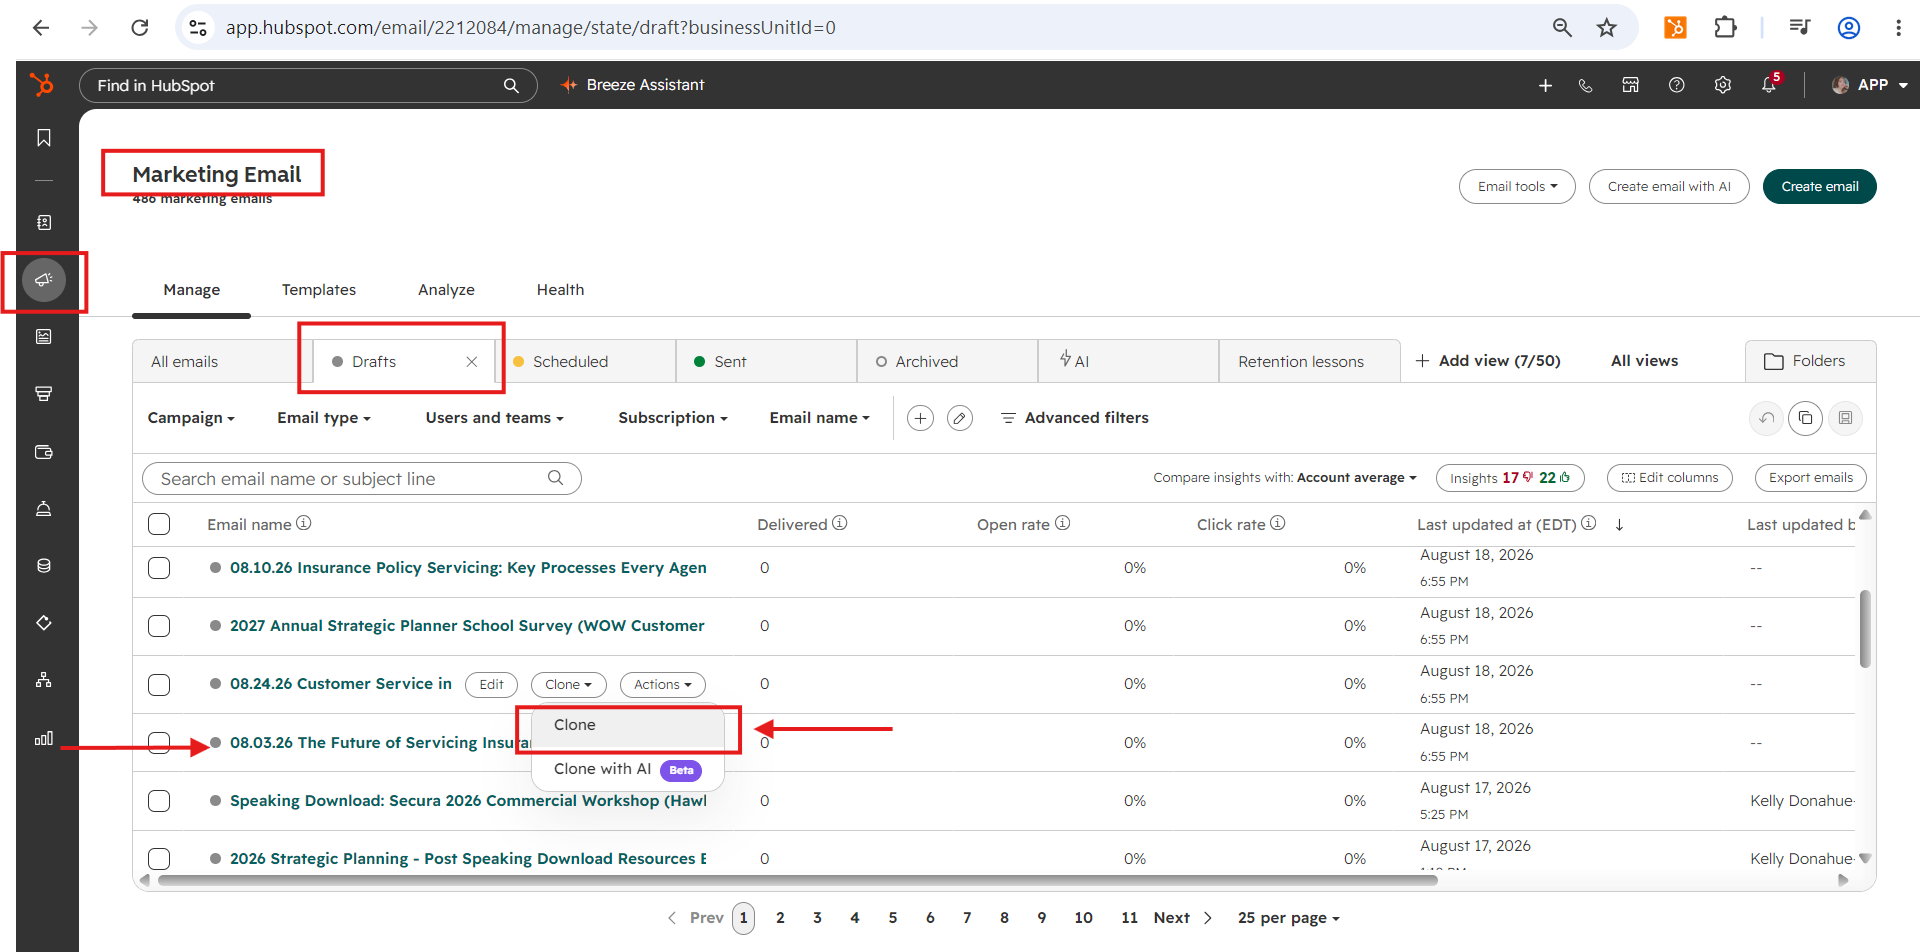
- Open HubSpot and navigate to Marketing > Email.
- Go to the Drafts tab to locate the master/cloned blog email templates.
- Click Clone on the target template.
- Open your Marketing Calendar to copy the date and exact title of the blog you are working on.
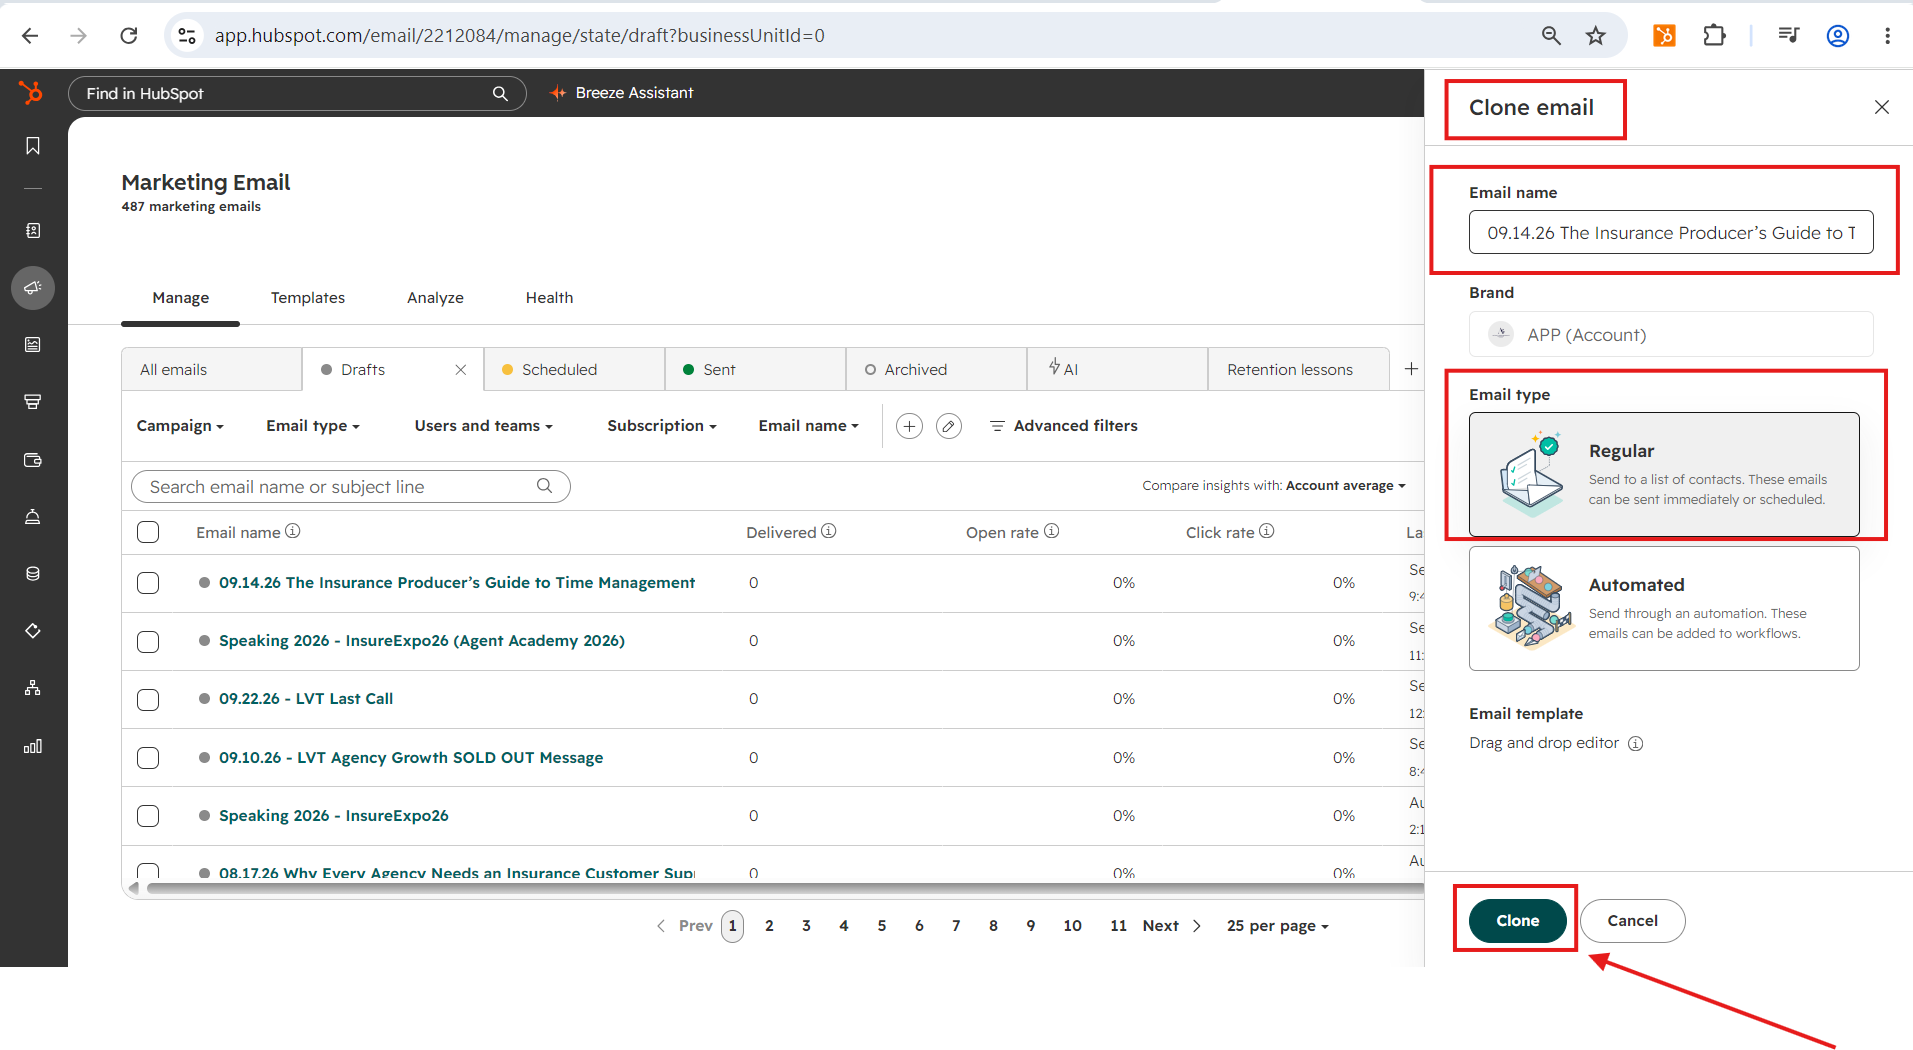
- Rename the cloned email using the format:
[Date] - [Blog Title].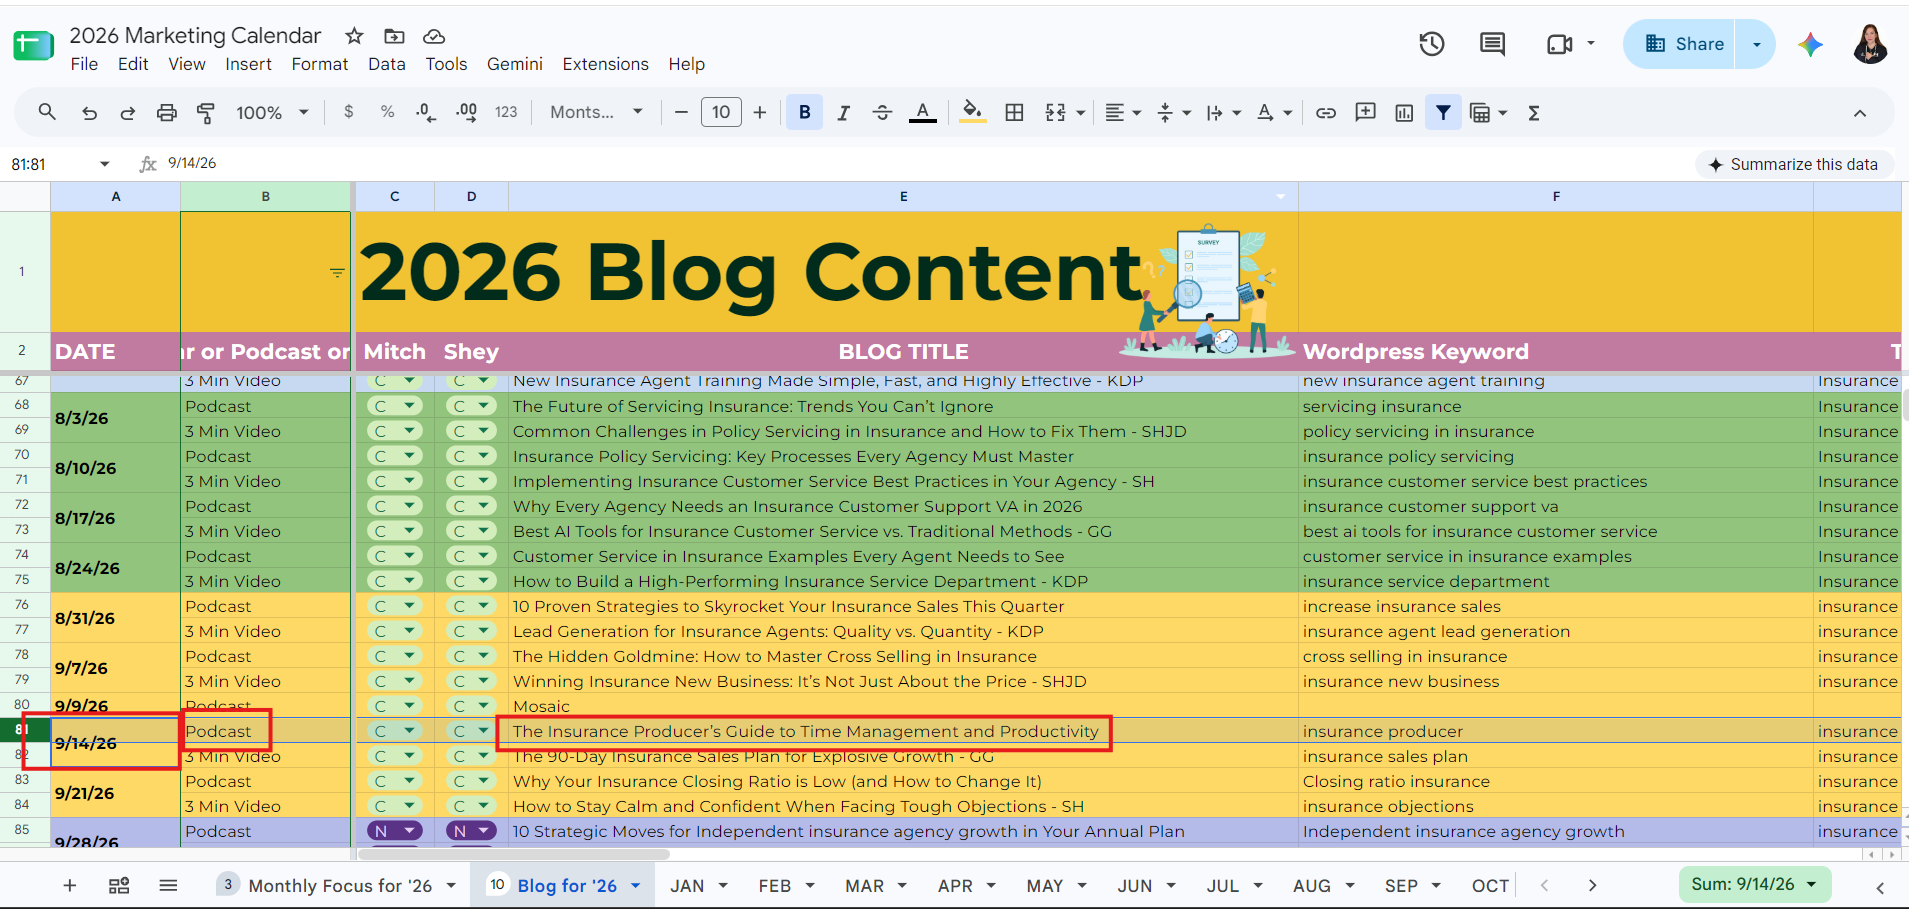
- Select Regular email type and click Create Clone.
Step 2: Update Header Image & Image Link
- Open your newly cloned email draft and click on the main header image to edit.
- Click Replace Image and search HubSpot for the image matching the date/title of your current blog.
- Select and insert the new image.
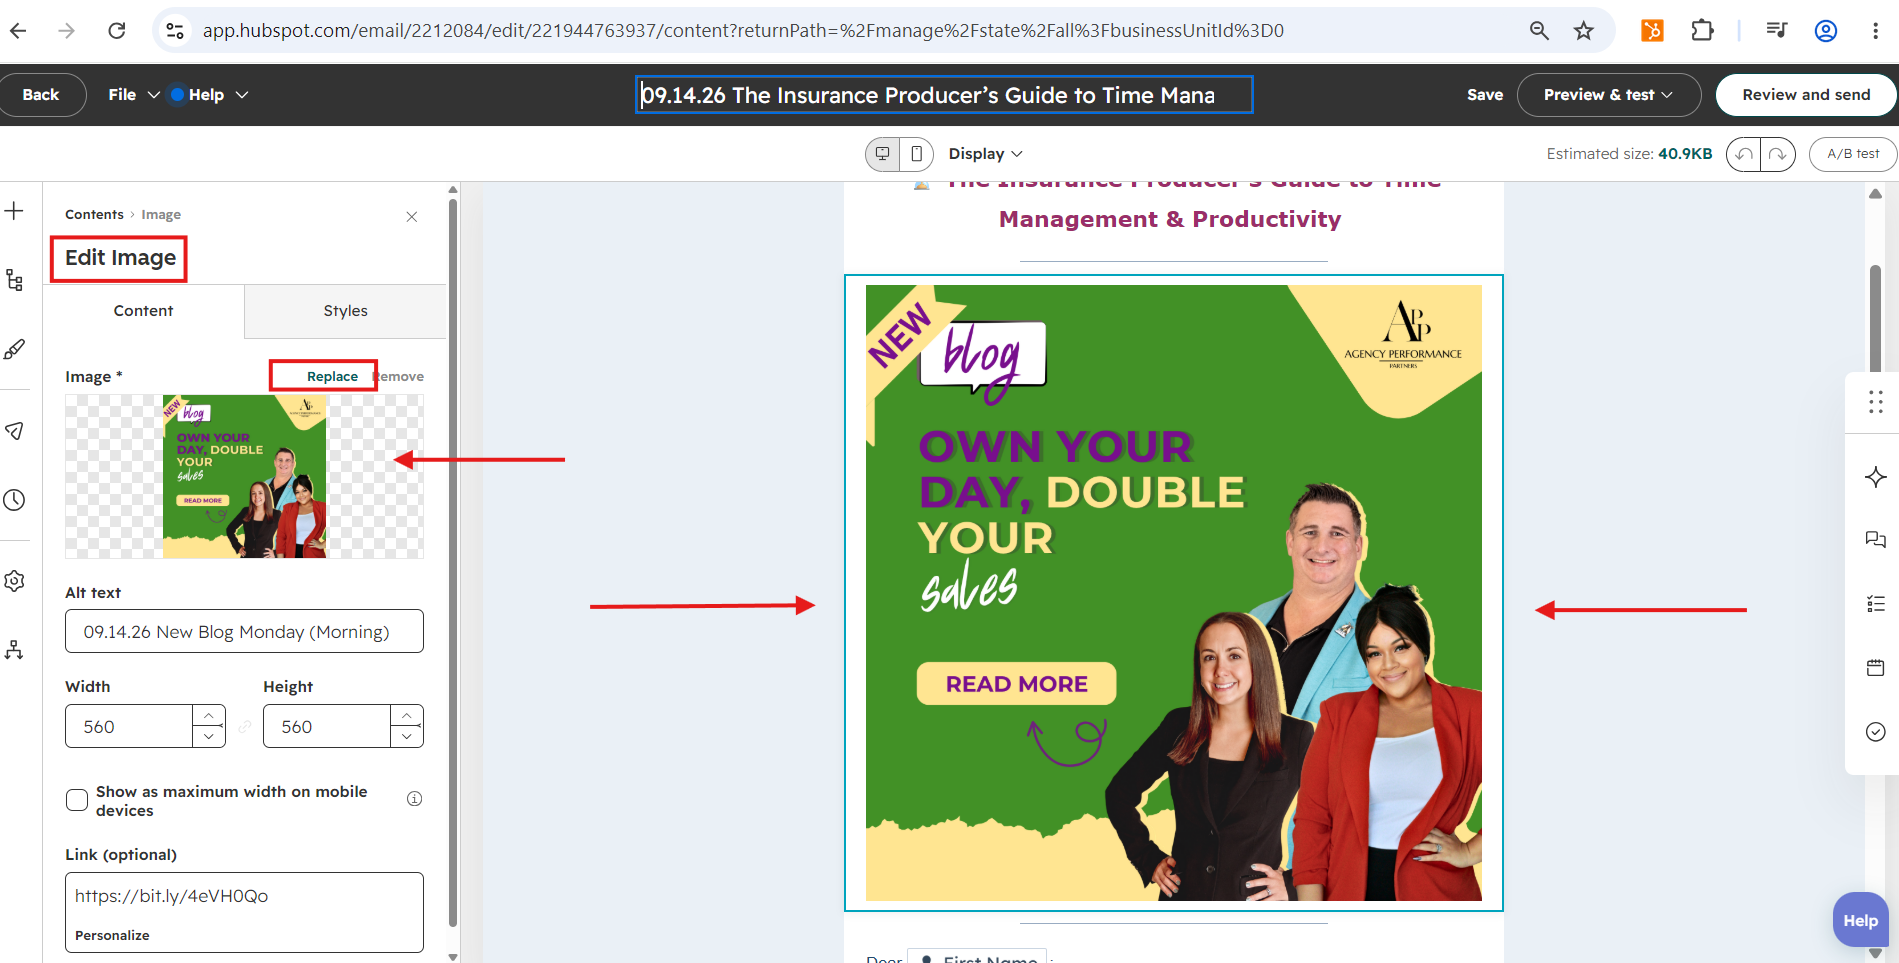
- Copy the specific Bitly link for the blog post from your Marketing Calendar.
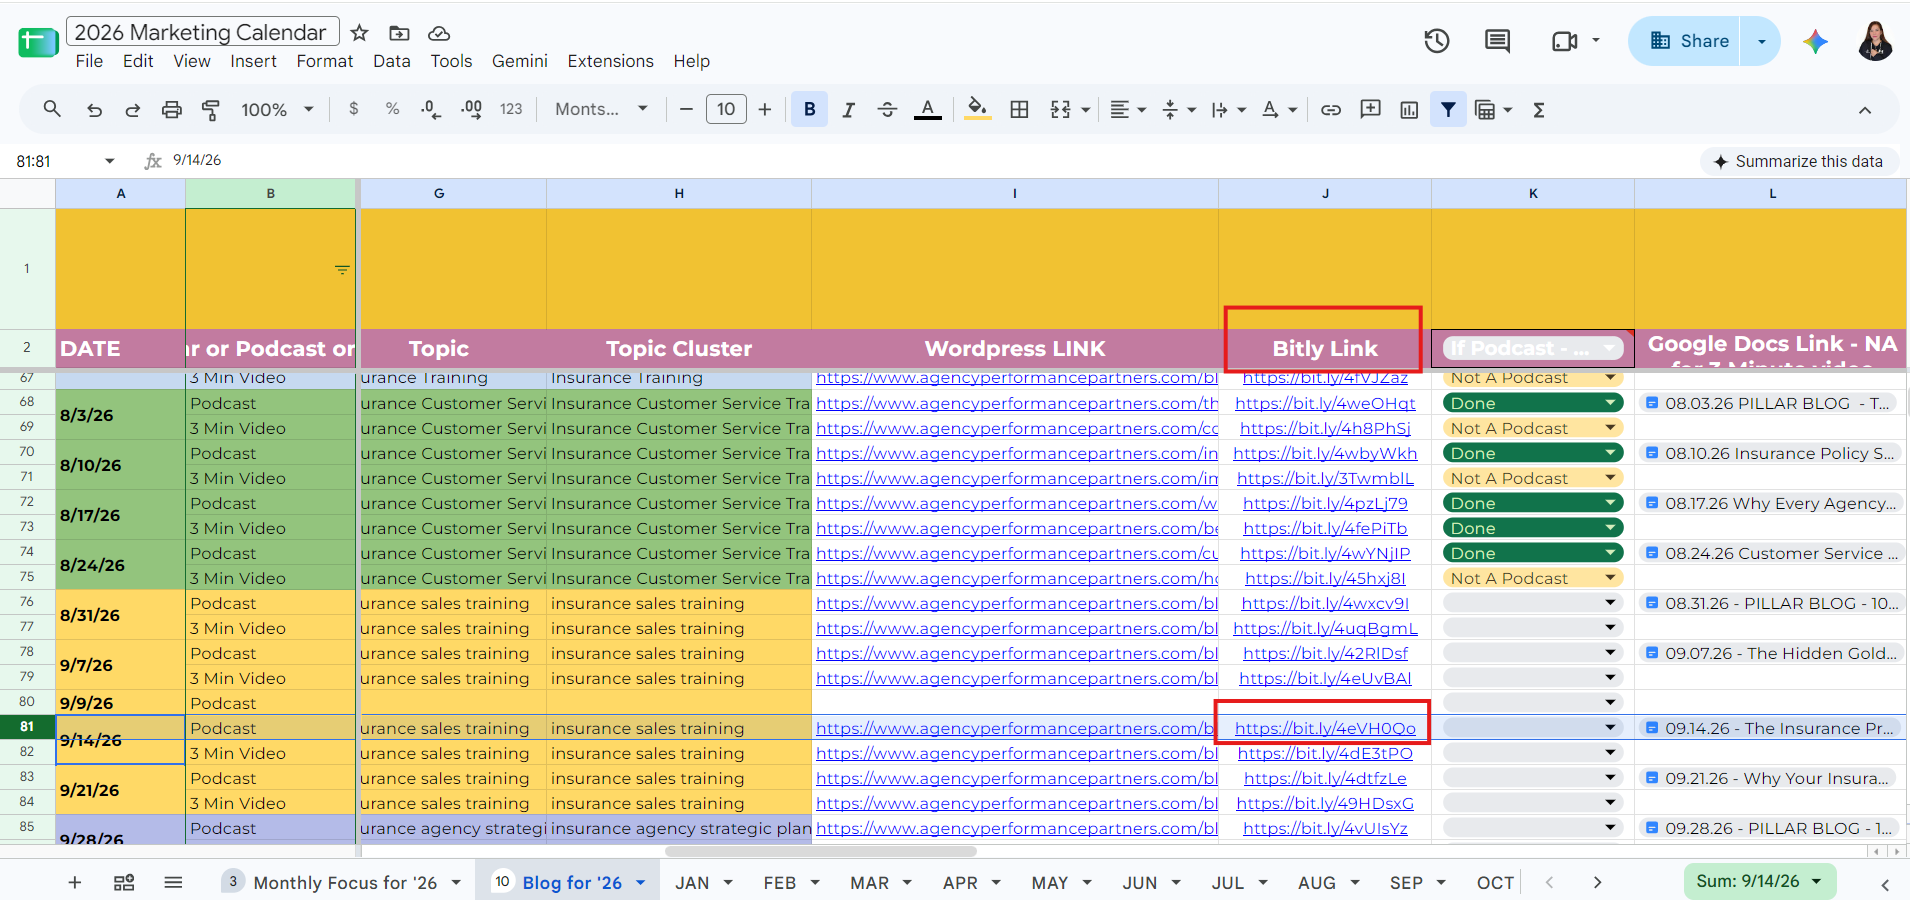
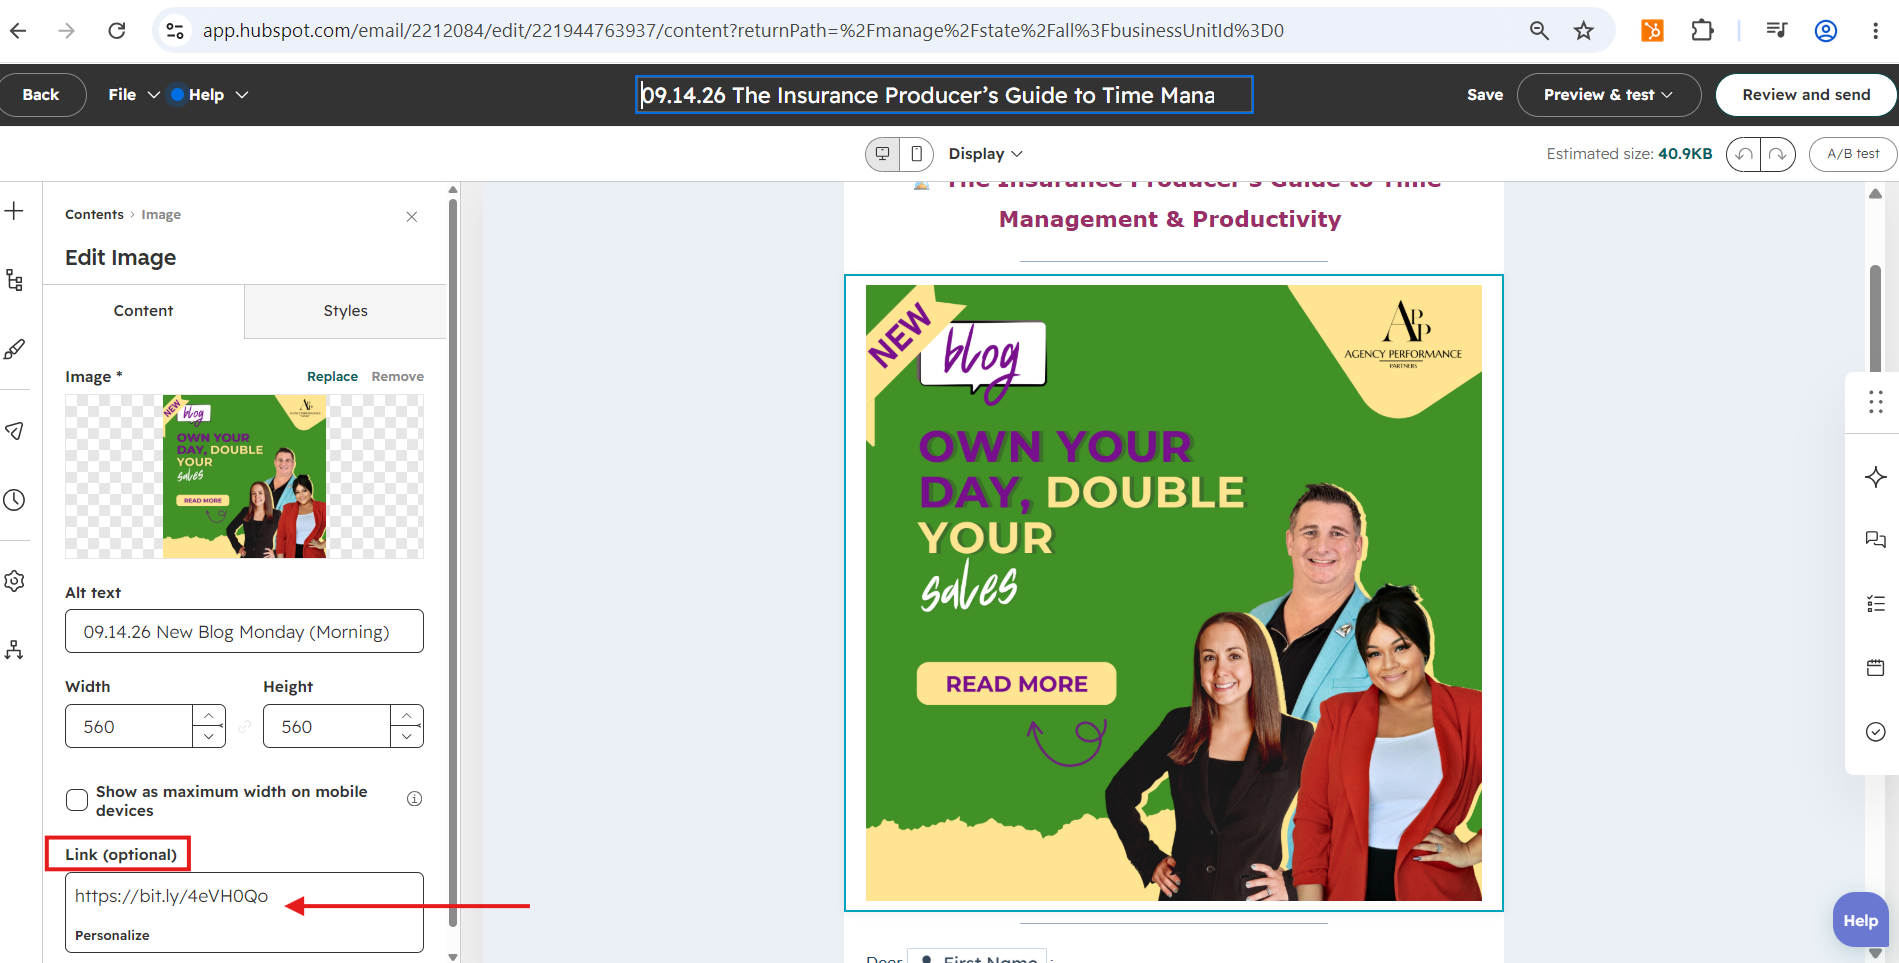
- Paste the Bitly link directly into the image's target URL field.
Step 3: Generate & Insert AI Copy (Subject Line & Preview Text)
- Open the original Blog Template for the post you are working on.
- Navigate to your Marketing AI Prompts document and select the prompt for Email Marketing Weekly Blog / Email Header & Subject Line & Preview Text.
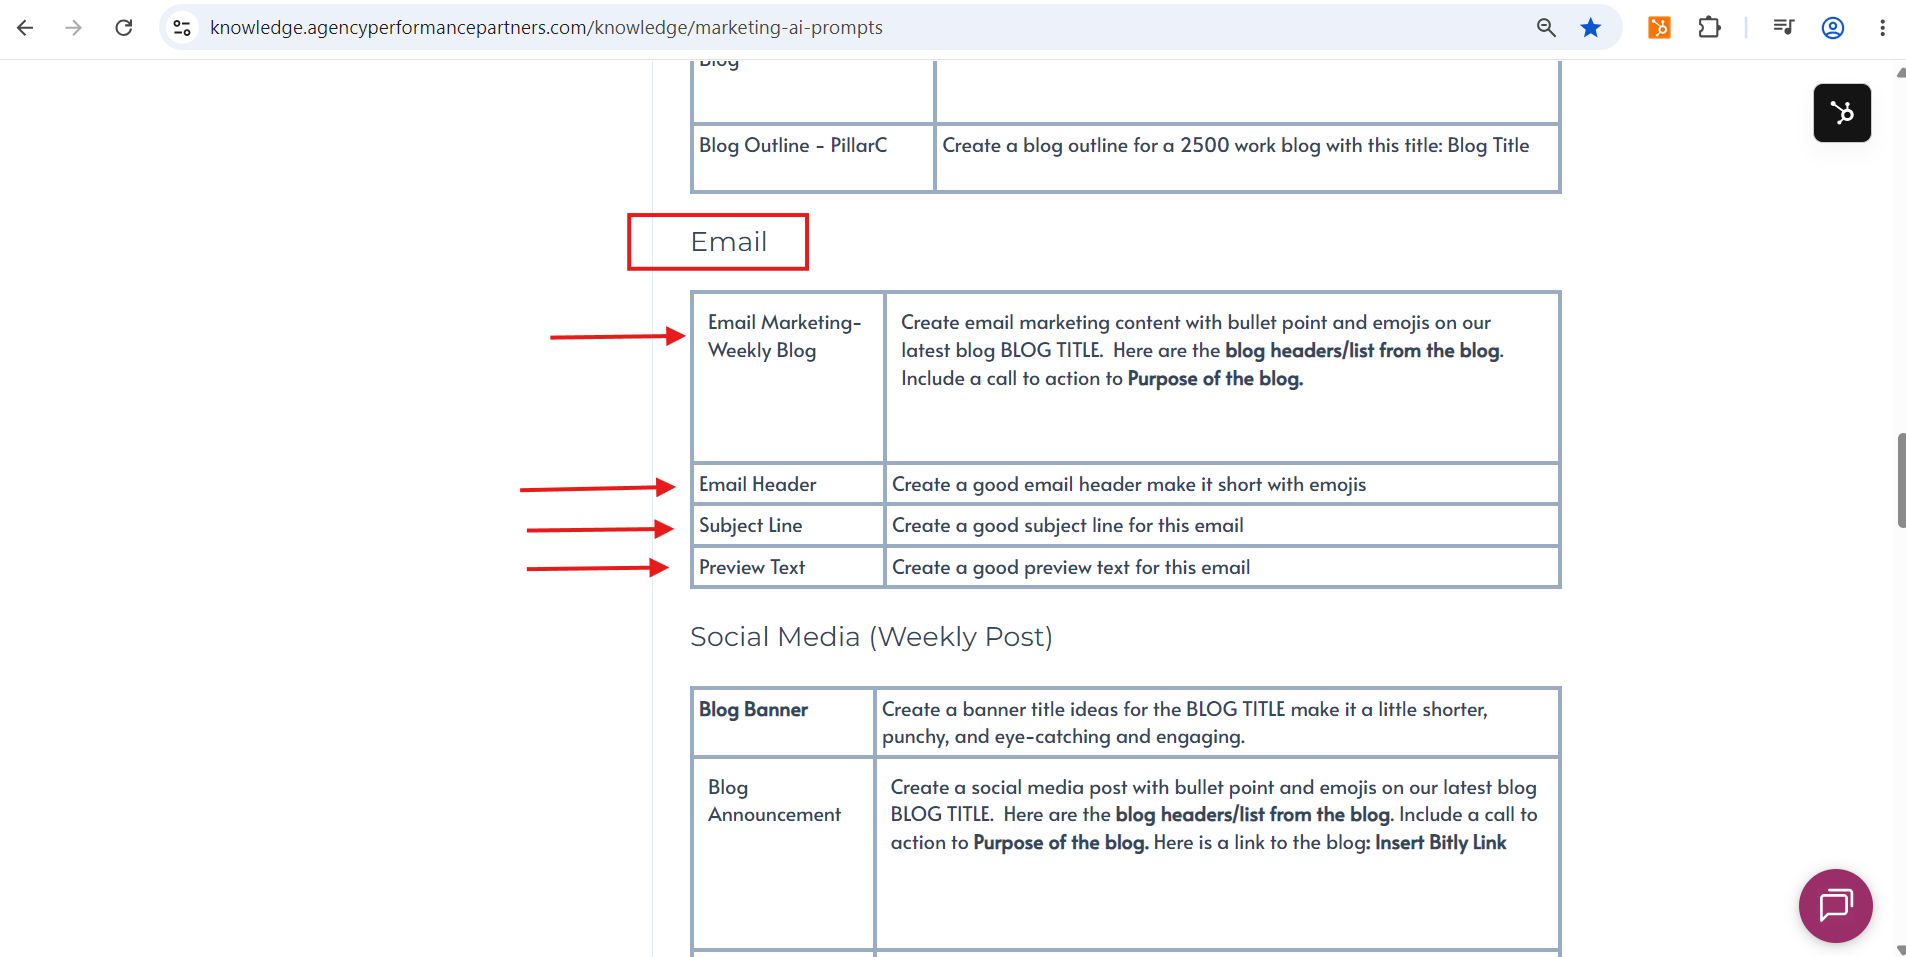
- Add the specific purpose of the current blog post into the prompt instructions.
- Paste the completed prompt into Gemini to generate your copy.
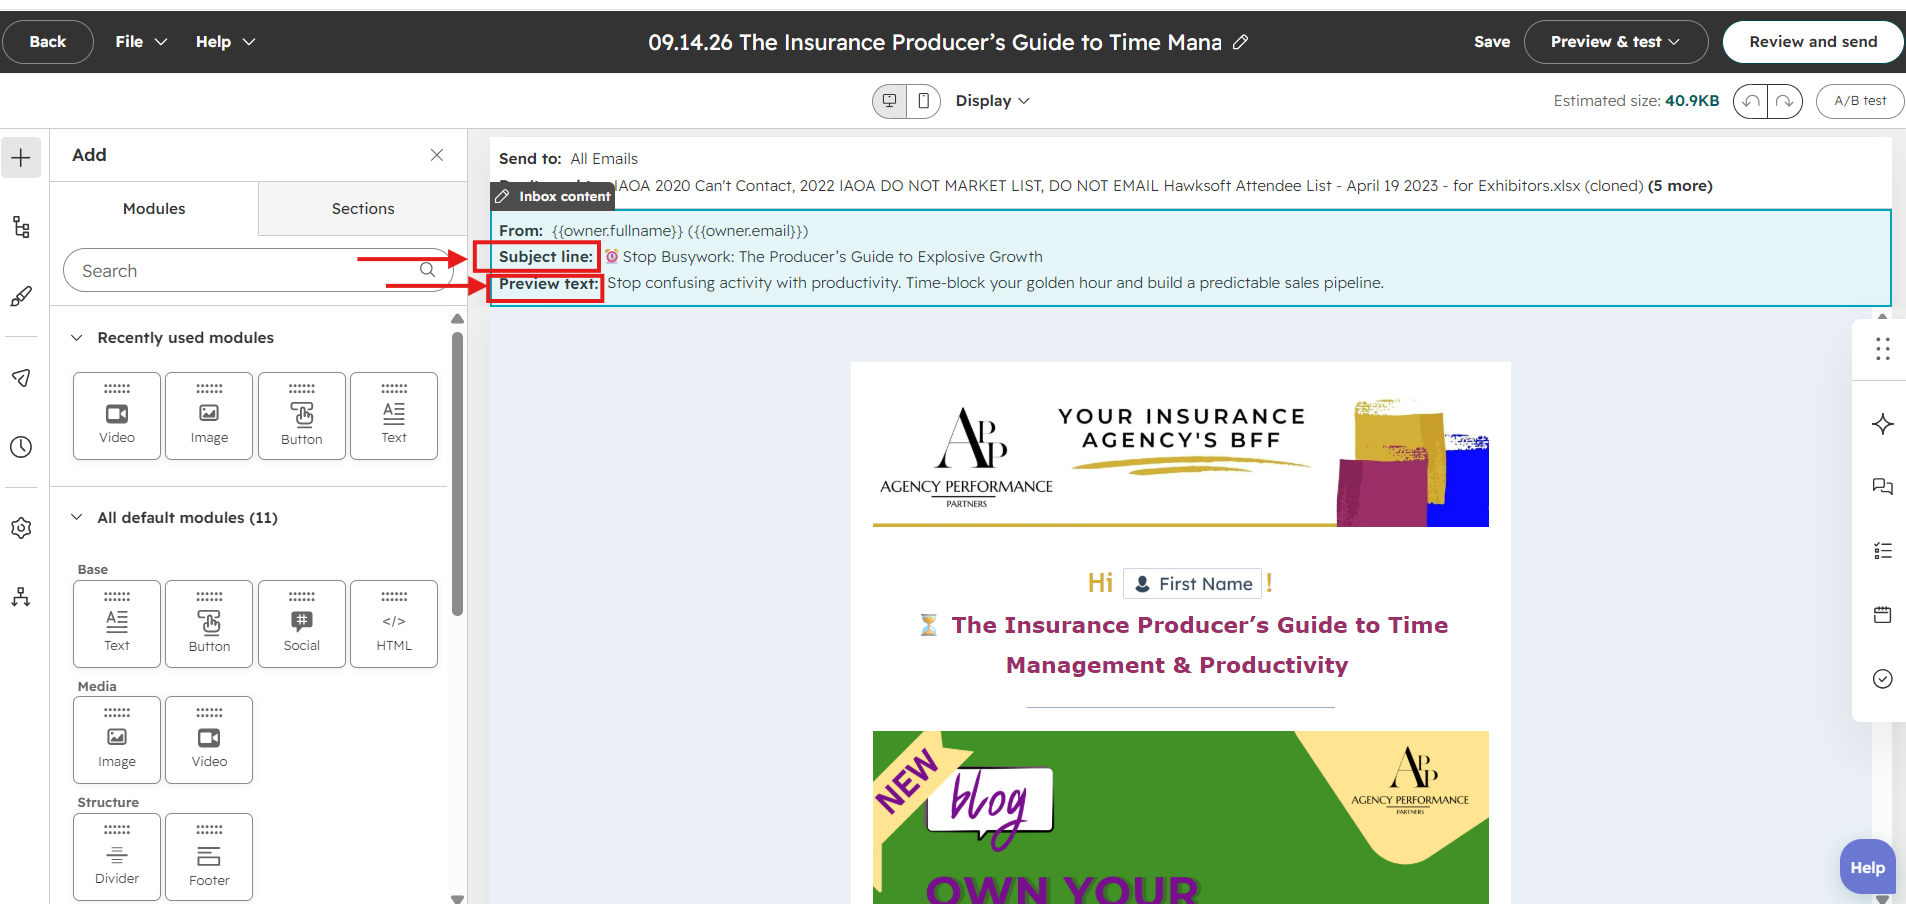
- Copy the AI-generated title and paste it into the email's Subject Line field.
- Copy the AI-generated Preview Text and paste it into the email's preview text box.
Step 4: Customize Email Body & Formatting
- Read through the email body copy to ensure clarity and accuracy.
- Adjust accent colors and text styling where necessary to fit agency visual standards.
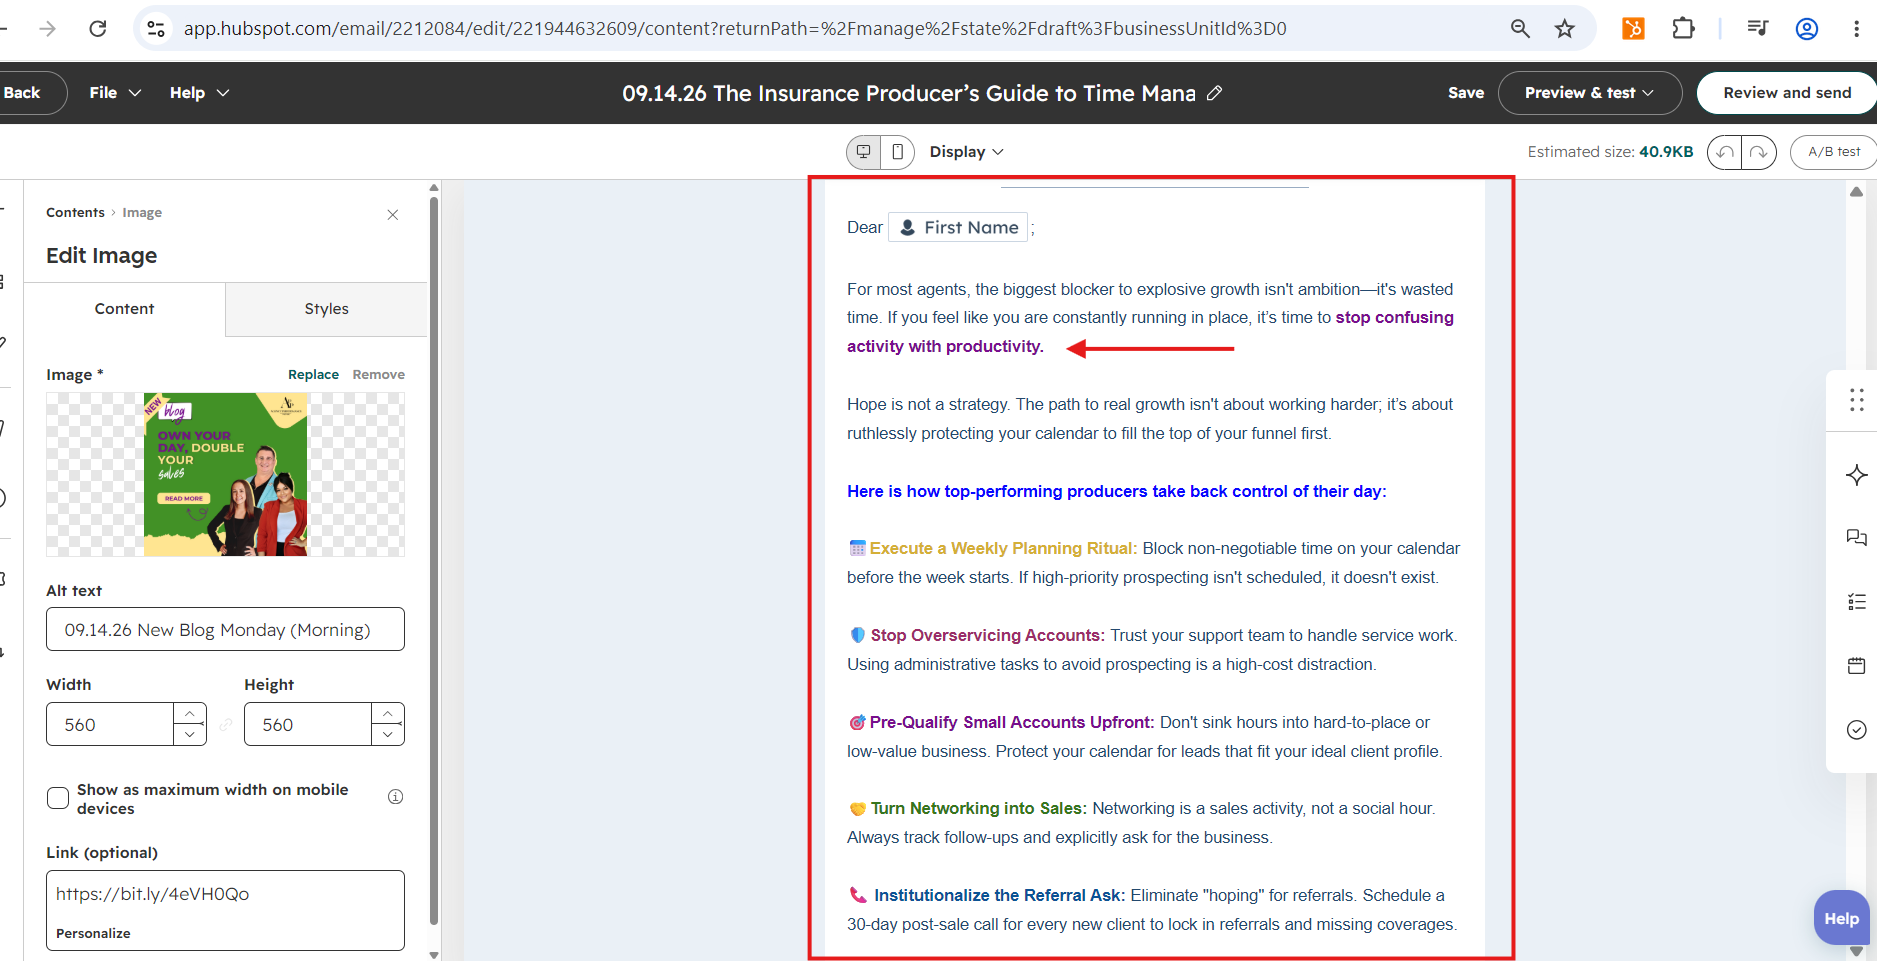
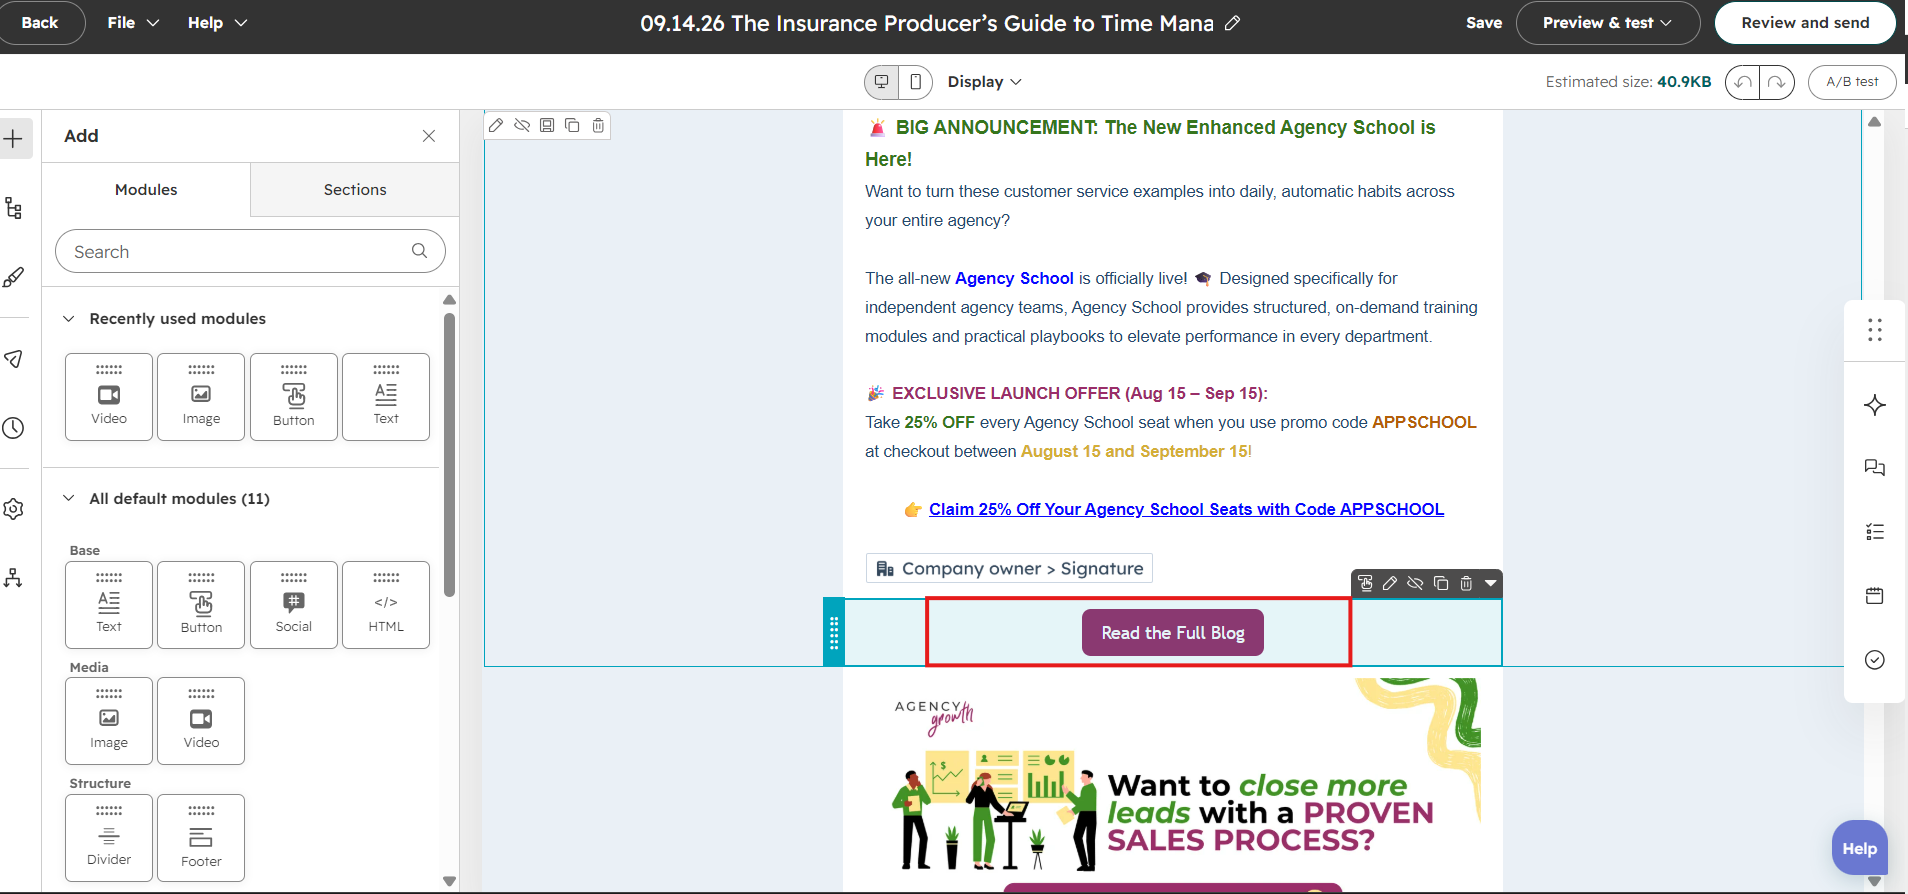
- Locate the "Read the Full Guide" section:
- Align the text/button to the Center.
- Hyperlink the text directly with the blog's specific Bitly link.
- Adjust and clean up visual dividers throughout the email to maintain a structured layout.
Step 5: Update Monthly CTAs & Graphic Assets
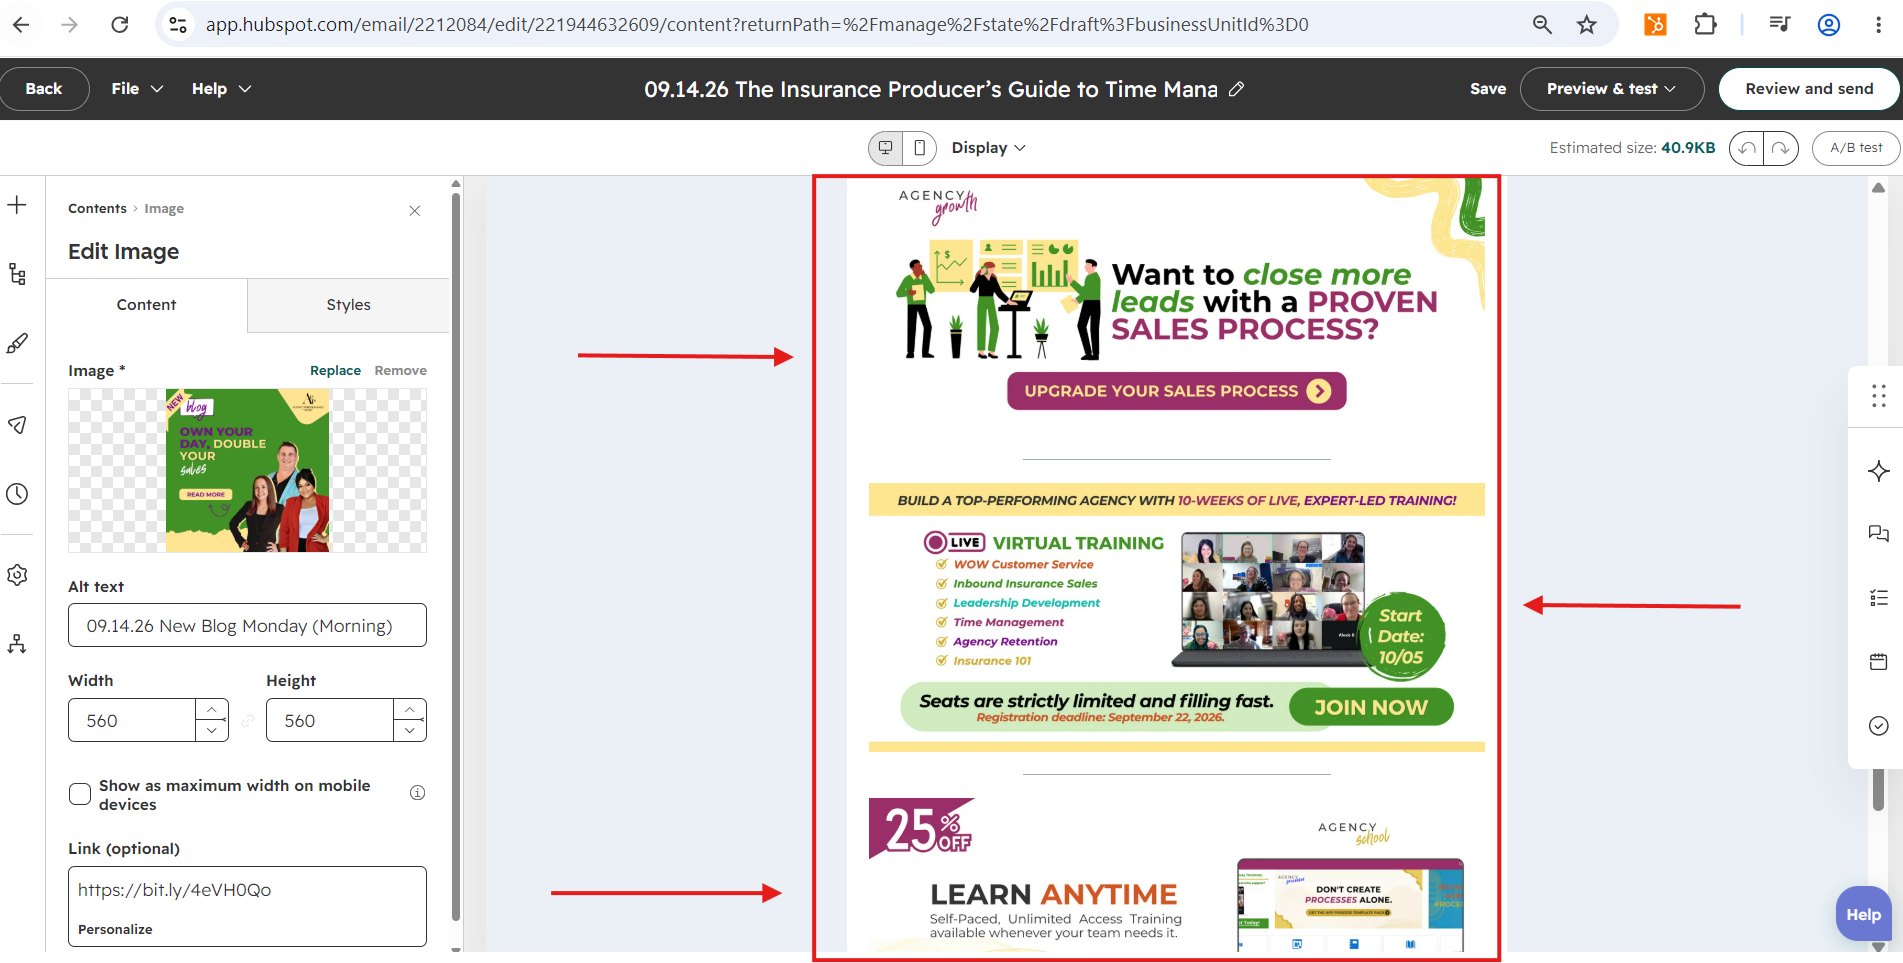
- Check the current month's active CTA requirements.
- Replace outdated graphic CTAs one by one with the new graphics downloaded from Canva.
- Attach the specific, dedicated Bitly link to each corresponding CTA graphic.
Step 6: Settings, Campaign Association & Scheduling
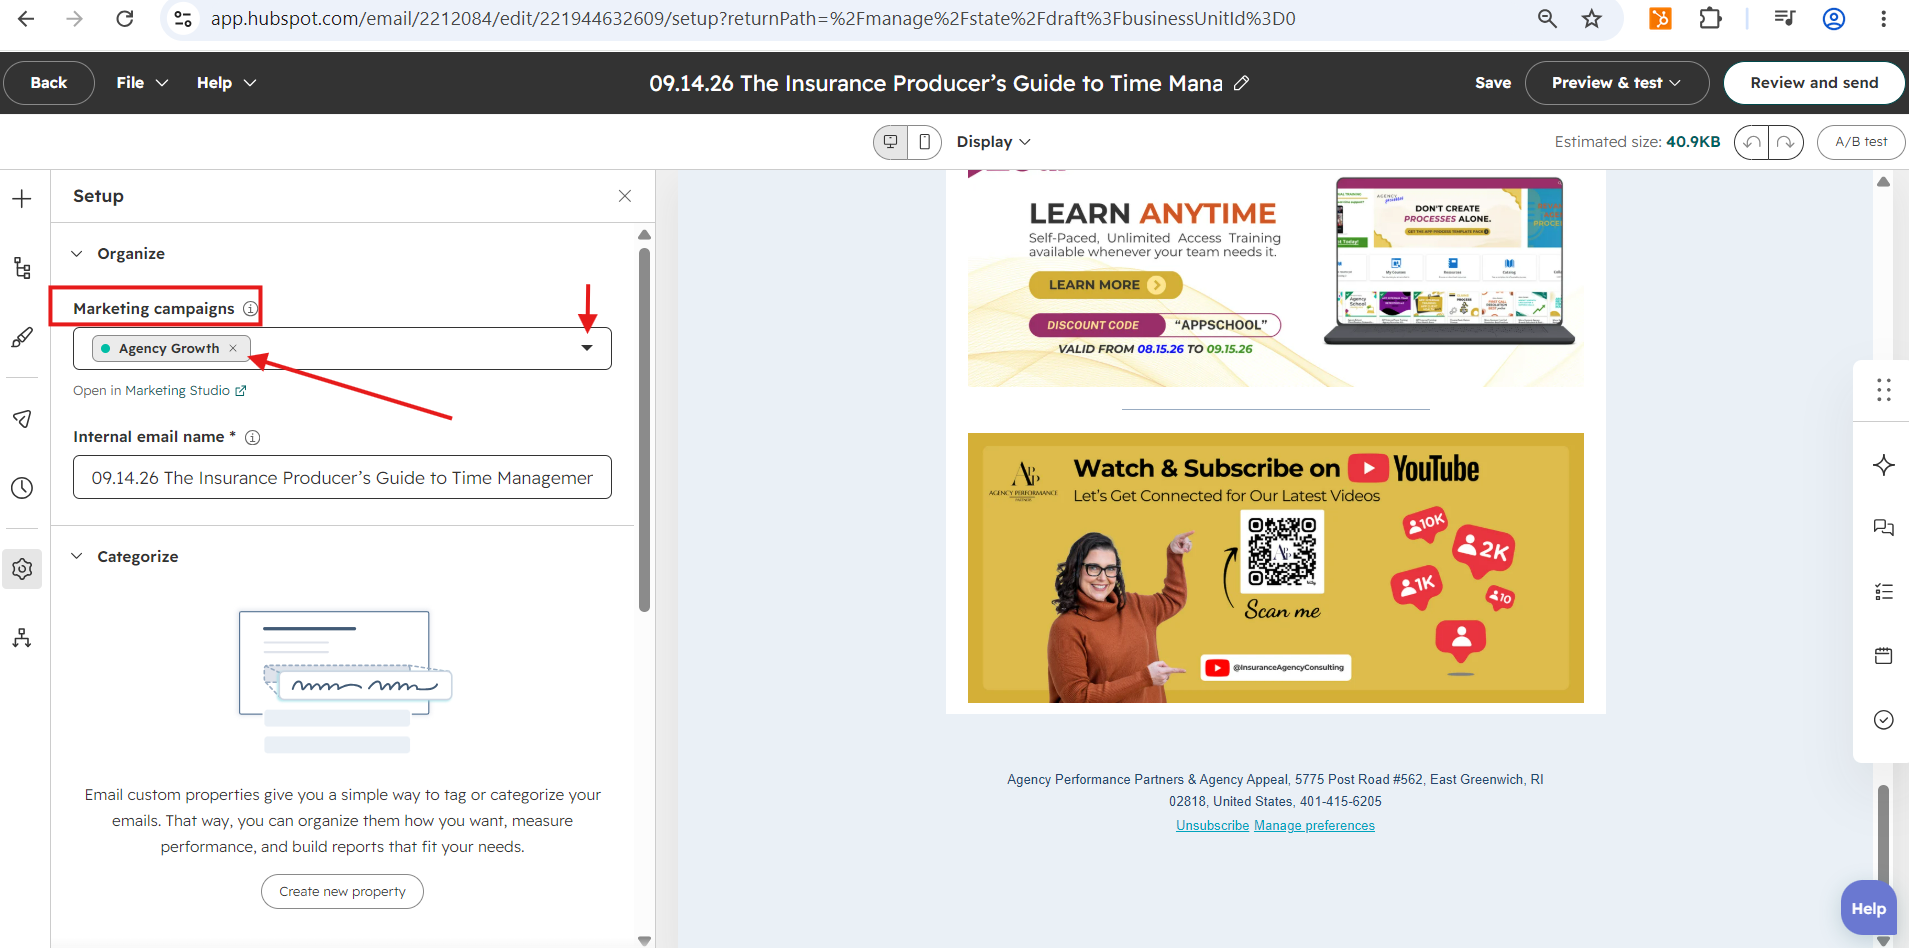
- Click into the email Settings tab.
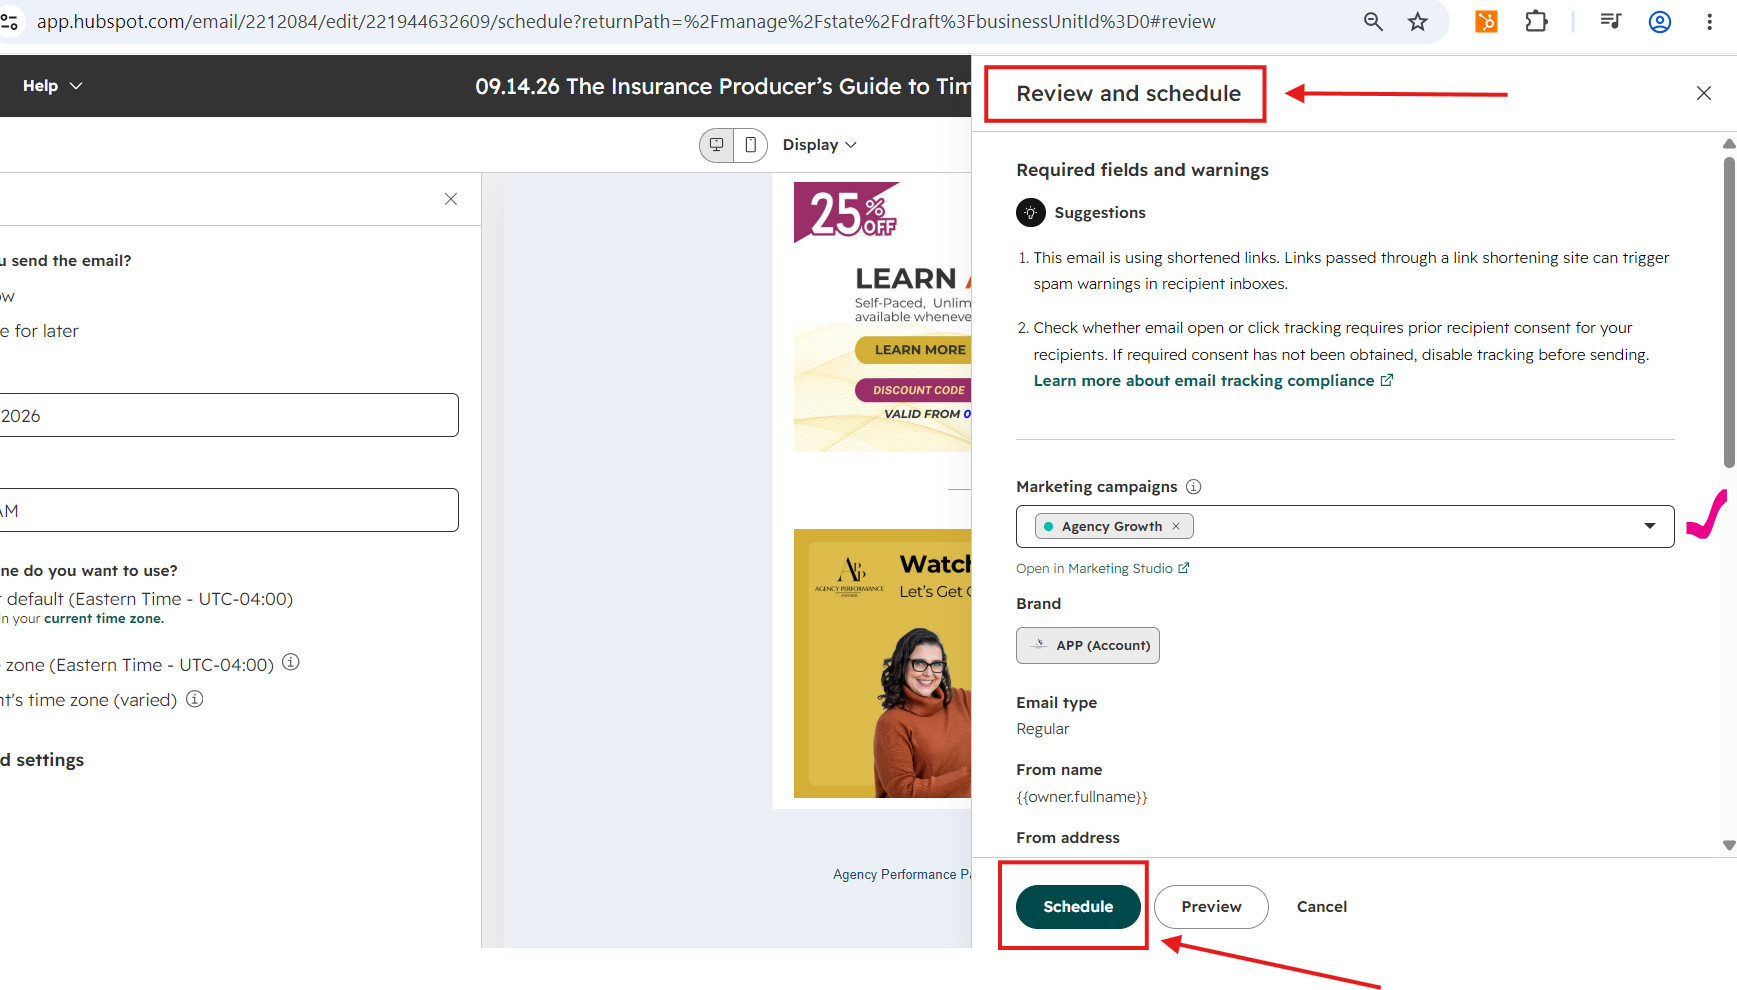
- Associate the email with the designated Marketing Campaign for that specific month.
- Set the delivery schedule for the first week of the schedule at 10:30 AM EST.
- Click Review to run the final system check, then click SAVE / Schedule!
VIDEO OF THIS ARTICLE: